Tractor batteries are essential, and knowing how to charge them properly is a vital skill for every farmer. This guide provides a step-by-step process, covering safety precautions and troubleshooting tips to ensure your tractor stays operational. For more advanced techniques, check out this helpful resource on tractor battery maintenance.
Getting Started: Assessing Your Tractor Battery's Condition
Before charging, inspect your battery visually. Look for corrosion on the terminals (metal posts), cracks in the casing, or any signs of physical damage. Significant damage may require battery replacement, not just charging.
If corrosion is present, use a wire brush and a baking soda paste (baking soda mixed with water) to clean the terminals. Always wear safety glasses and gloves when handling batteries; battery acid is corrosive.
Next, use a multimeter (a device that measures voltage) to check the battery's voltage. A fully charged 12-volt battery should read around 12.6 volts. A significantly lower reading indicates the need for charging.
Finally, locate the Amp-hour (Ah) rating on your battery. This rating (similar to a gas tank's capacity) indicates the battery's power storage capacity. You'll need this to select an appropriate charger. Higher Ah ratings require more powerful chargers. Don't you want to avoid a weaker charger that struggles with your tractor battery?
Choosing the Right Battery Charger
Selecting the correct charger is crucial to prevent damage. The charger's output voltage must match your battery's voltage (typically 12V). The charger's amperage (A) determines its power delivery rate. Higher amperage charges faster but could damage the battery if misused. Automatic ("smart") chargers are recommended; they adjust charging rate and prevent overcharging. They're like insurance for your battery. A fact: using the wrong charger can shorten your battery's lifespan by up to 30%.
Use a charger appropriately sized for your battery's Ah rating. A charger too small will take exceptionally long to fully charge the battery and potentially result in damage.
Charging Your Tractor Battery: A Step-by-Step Process
Follow these steps for safe and effective charging:
Safety First: Always wear safety glasses and gloves. Work in a well-ventilated area.
Prepare the Charger: Ensure the charger is unplugged from the power outlet before connecting it to the battery.
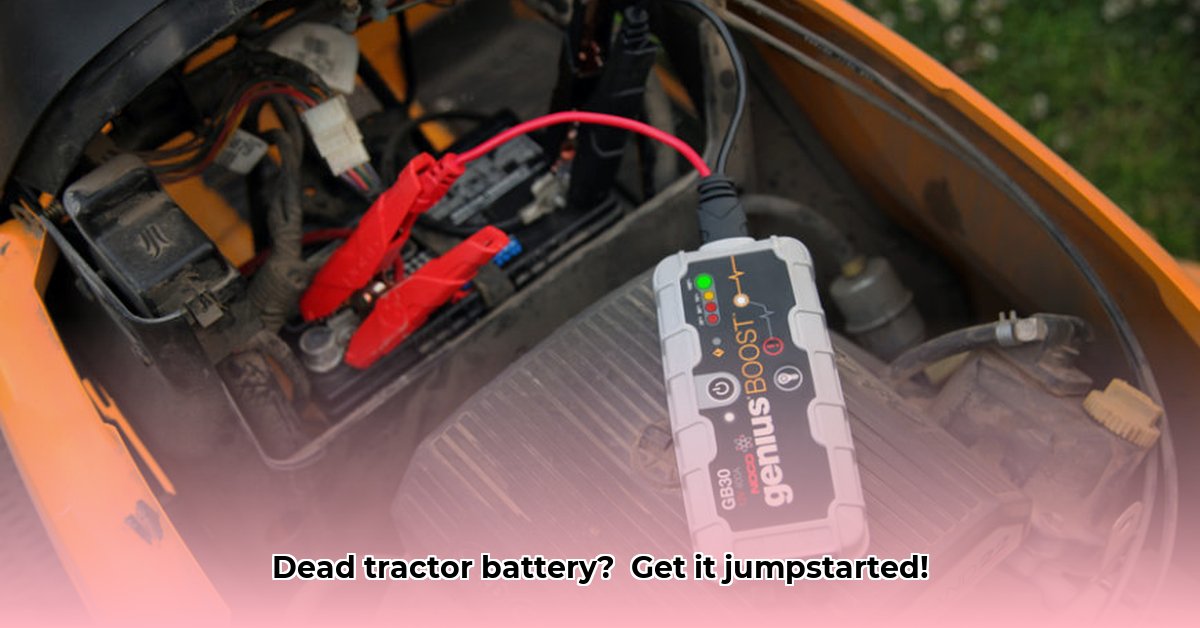
Connecting the Charger: Attach the charger's positive (+) lead to the battery's positive (+) terminal, then the negative (-) lead to the negative (-) terminal. Incorrect polarity can cause sparks and damage.
Activate the Charger: Turn on the charger and select the appropriate charging mode or amperage setting, according to the battery and charger specifications. Monitor for unusual signs (excessive heat or bubbling).
Monitoring the Charge: Observe the charger's indicators or use a multimeter to monitor charging progress. A fully charged battery will generally read around 12.6 volts.
Disconnecting the Charger: Once fully charged, turn off the charger and disconnect the leads. Always disconnect the negative (-) lead first.
Troubleshooting Common Charging Problems
Here are solutions to common charging issues:
Slow Charging: Review all connections for cleanliness and security. Dirty terminals are a frequent problem. Also, check the charger's output; it might be malfunctioning. A severely discharged battery can also cause slow charging.
Charger Malfunction: Confirm proper power outlet connection and functionality. Check the charger's fuses; a blown fuse will prevent operation. Replace the charger if problems persist.
Table: Charger Amperage Recommendations Based on Battery Capacity
This table offers guidance on suitable charger amperages for various battery capacities. Consult your charger's instructions for specific recommendations.
| Battery Capacity (Ah) | Suggested Charger Amperage (A) |
|---|---|
| Under 100 | 2-5 |
| 100-200 | 5-10 |
| Over 200 | 10+ |
Regular battery maintenance, including consistent charging and terminal cleaning, extends battery life. Remember, a well-maintained battery ensures your tractor's continued operation! Isn't that a key to a successful harvest?
Best Practices for Winter Battery Maintenance
Cold weather significantly affects battery performance. Prolonged cold can lead to significant power loss, even if initially fully charged. Consider these best practices to mitigate this issue:
- Trickle charging: Use a low-amperage ("trickle") charger, designed for small batteries, to maintain a slow, steady charge throughout the winter.
- Battery removal: For optimal protection, consider removing the battery and storing it indoors in a cool, dry location. This prevents freezing and reduces self-discharge.
Regularly inspect your battery for corrosion, ensuring optimal performance. Consistent maintenance safeguards against unexpected failures and prolongs battery life.